Ellie is 95


Its hard to believe its been 5 years since I first meet Ms. Ellie.

For her 90th birthday celebration I was consulted on her cake.  

She wanted a large cake with 90 candles on it. When it was lit, the local firemen, in full gear, rushed in to help her put out the fire.  I regretfully do not have pictures of the cake or the event, but it was  fun evening for all.

So Ellie is now 95 and the family was celebrating in a smaller manner but they still wanted a reference to the fire department on her cake.


The cake was a 9" Spice cake with a Apple-butter Cream Cheese filling.


I think it is important to always make more flowers or items needed for your cake.   While putting the final touches to your latest creation, you do not want to break a piece and not have one in reserve to replace it with. 

 I always work under this practice and often I'm left with a reserve of flowers, which works out well for last minute orders ;)


The building is a flat piece of fondant which was a reserve piece from another cake.  The flames were cut from a french filagree set.  The pink peony was also a reserve flower from a prior wedding cake. 


 I love candles and I'm always looking for new designs to use on my birthday cakes.  These are from Wilton.


Shelby's Love of Baseball


This young lady was very specific in her description of her birthday cake.

The cake serves 40 guest and consist of a 10" Chocolate with Peanut Butter Mousse and the Ball tier is Banana with Banana Custard.

All of the design elements where made of fondant in advance to allow time for drying.

The cake is covered in pink and yellow fondant, with royal frosting accents.


Happy Birthday Superstar!!!

I was hoping to get a final picture at the venue, but again forgot the camera.

Kettle Bell


I took this order via text messaging... I  love technology (I just wish I was better with using it) LOL.

I baked several layers of cake and after filling and stacking, I cut them into the shape of a Kettle Bell.  

The handle is rice treats molded over a new white-clothing-hanger cut and shaped.

The cakes where, three layers of white and three layers of chocolate, with an all fudge filling.

 It is covered in chocolate fondant and the lettering was done using the funky alphabet cutters.


Pecans


On a return trip from Cocoa Beach Florida, we stopped in Georgia and purchase several 10 pound bags of paper-skin Pecans.  They took several days to remove the shells, but the work was well worth the final outcome.


All the nut meat was then placed in quart freezer bags and frozen.  I can then use them raw or roast them for a rich flavor, in my recipes.  

Happy 50th Anniversary


A hugh milestone in a couples life, is the 50 Anniversary!

This was a very intimate gathering of family and friends.

The  cake was a 10" Almond cake with fresh Raspberries and the top was Walnut with Walnut Mousse.


The cake was covered in fondant and royal frosting filagree.  

4mm dragees were placed at the tips of the filagree.  

The gold lettering was cut from FFM alphabet and numbers.  
The roses were done in white gumpaste and painted with Gold luster dust and lemon extract.  

The top was left undecorated as the adult children of the couple were bringing the original cake top.


Baby Blue Kicks


The Life-size JEM booty cutter was used to create these cute baby shoes.

I love the little toe pattern. 


The bottom tier was a 12"  Lemon with a fresh Raspberry compote.
The top tier is Italian Cream with Coconut Custard
The frosting is buttercream and is embossed with a diamond pattern which had a fondant bead at each point.

Paw puppy for Ireland

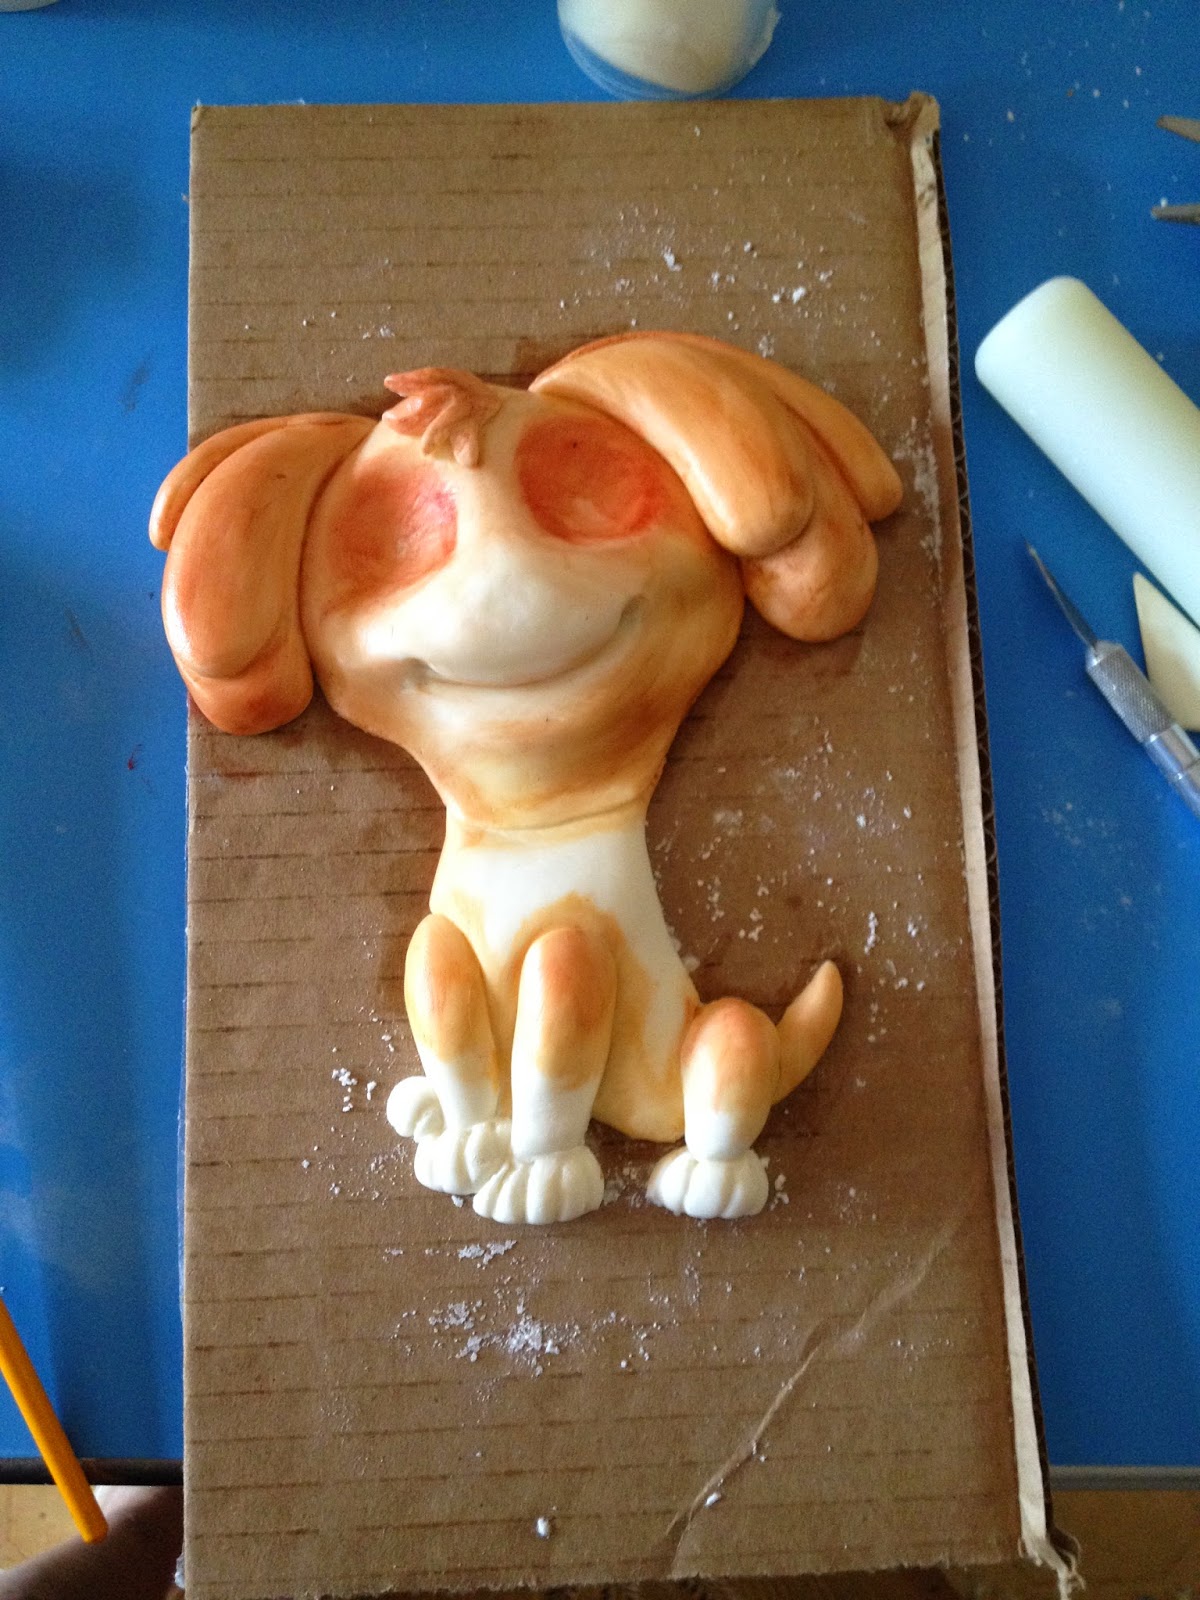
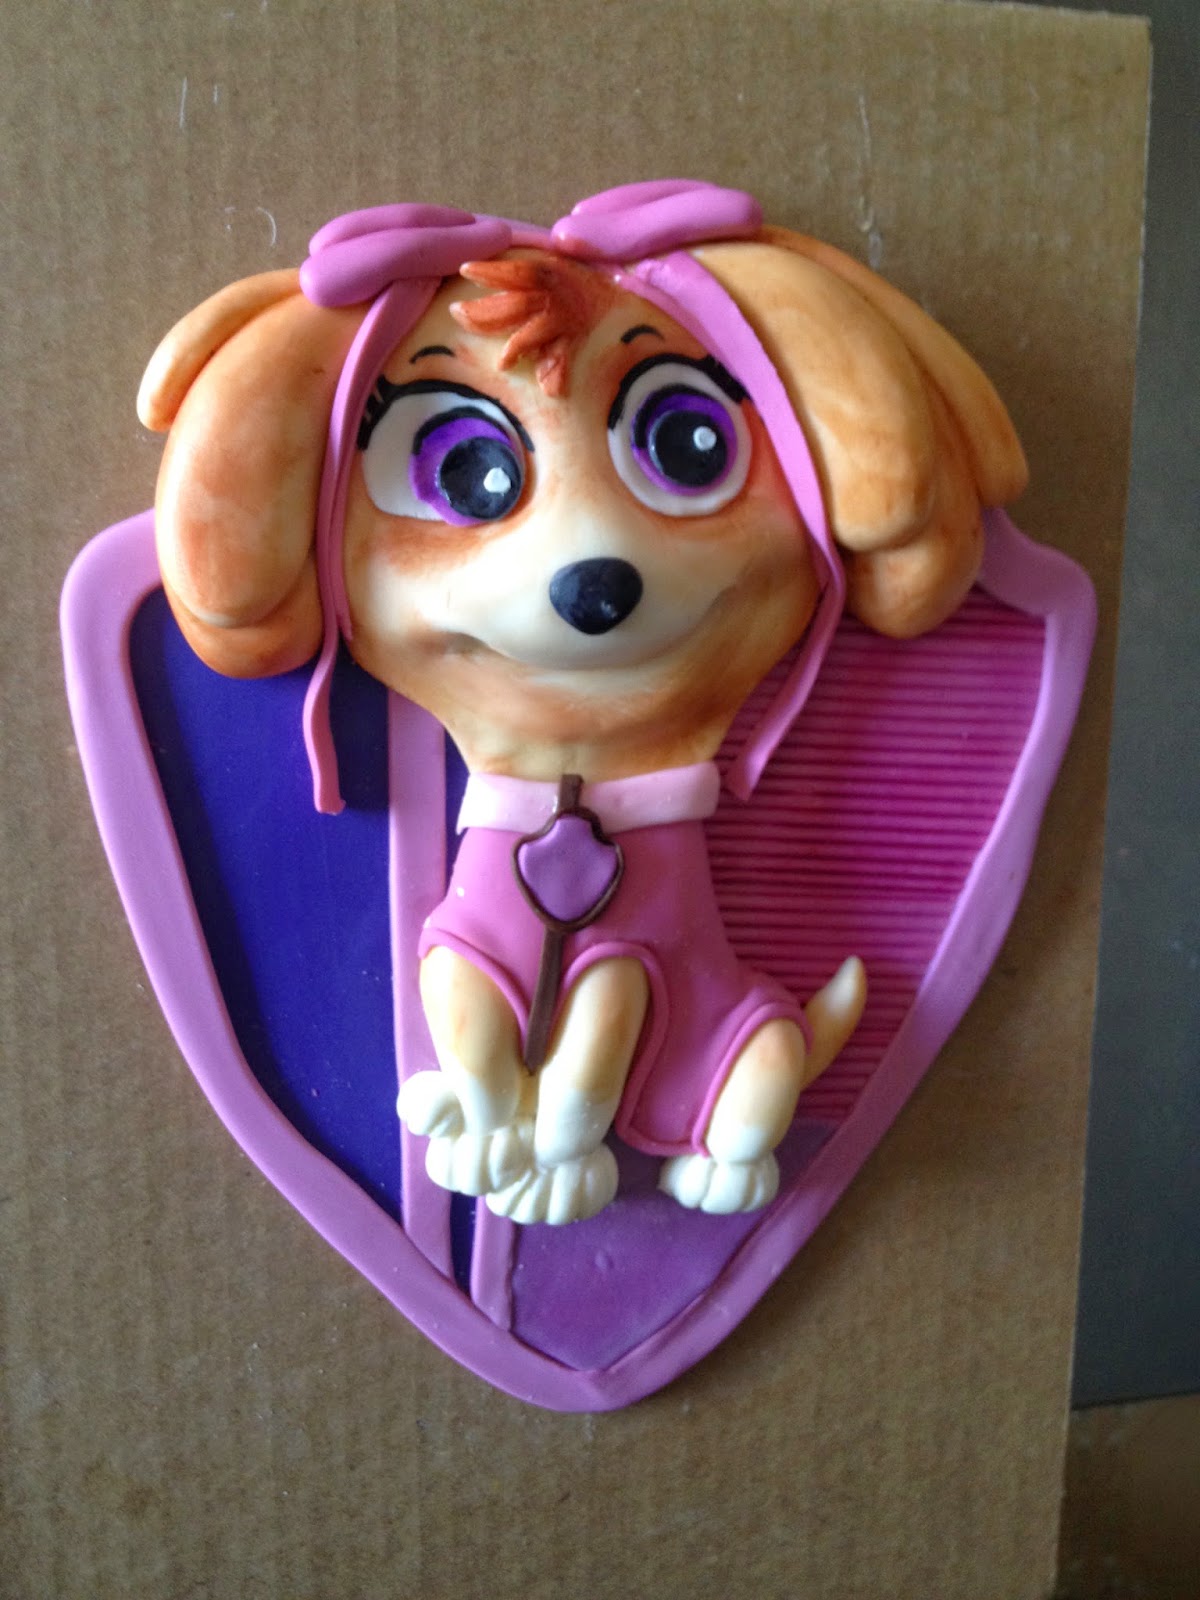
Using a coloring page from the internet, I molded the character in fondant. 

 When creating a 2-D version you must first start with a frame, as you can see, I started with the chest and hind quarters of the dog and added the tail as the first appendage. 


Here are her legs and fee.


Then the head, with indents for eyes and mouth.  The hair is individual rolls.


As the colors are soft,  I used petal dust and crisco mixed for paint.


I wanted the eyes to be bright and crisp, so the petal dust is added to a small amount of vodka, which makes more of a water color paint.


for the finished character, fondant googles and her sweater and tag are added.  I created a triangle shield for added support as I was using a triangle shape cake. 


The cake was French Vanilla with strawberry compote and frosted in buttercream with a simple shell boarder.

The birthday girl name is cut from FFM alphabet letters and placed on a fondant ribbon.


Peach Wisteria

   
I first start with a small teardrop of gumpaste.  I insert a 32 gauge wire into the narrow end of the drop and make a small crease in the bulb end.

      
I have attached a very small calyx to the base of the bulb.

Peach petal dust gives a soft color to base of each bulb.

 
Tape several bulb together in a graduated fashion. Take the rest of the bulbs and using a small rose cutter, wrap one petal around the bulb to create the open flower.


Wisteria grow in long draping blooms.


This finished cake consists of an 8" and a  5".  The cake is covered in buttercream and wrapped in peach fondant ropes.  the lettering was done using the JEM alphabet cutters.  The 25 is cut with Funky Number cutters.


Red Flowers


I work on flowers each day.  It is one of my favorite parts of cake decorating.

After a few months, I am left with bits and pieces of colored gumpaste.  I often make fantasy flowers that can be used as filler in arrangements.

Here I have used approximately 1/2 cup of gumpaste to create several flower.   I like to make a variety of sizes, which can be used in one arrangement of several flowers or used separately in several arrangements.

Any cutter may be used along with any center for these flowers. I used an hibiscus, anemone and a status cutter respectively.

Wafer Paper display cake


This design was done as a dummy display cake.
  
I first started by cutting strips of wafer paper in various widths.    

I used food safe markers in blue to add design to the strips and silver luster dust for the details.  Using a piece of craft foam which I marked with solid and broken lines I folded the strips in a fanfold pattern.

The strips are glued end to end to create a piece long enough to go around the circumference of each layer.  The bottom layer was one 3" wide piece of folded wafer paper.  The next tier is two separate 1" stripes folded wafer paper.    The third tier is one 2" piece and the top tier is three 1" strips.  Each of the strips are glued to the fondant covered cake dummy with a thinned down piping gel.

I cake is not finished but I loved the folded wafer paper,  so I thought I would show you!!!   I would love to make some wafer paper flowers to finish the design, but it will need to wait to another day, customer orders need my attention.


Embossed Fondant


Embossed or textured fondant gets a slightly thicker roll than you would do for a smooth finish.  After rolling the desired dimension of the cake you are covering,  you will need an embossing template, which may be purchased from any cake supply company.

Prepare the wrong side of the template with a very light coating of shortening, working carefully around all the openings.  I then use a paper towel to remove any excess.  

Next careful place your fresh rolled fondant over the prepared side of the template and gently working the palm of you hand over  the entire surface.  You should have slight indents where the fondant has pushed through the openings.   Once you feel that all of the fondant is embossed, lift the template (which has the fondant attached) and place it over your cake.  

Gently remove the template and smooth the fondant top and sides to attach it to your cake.  


You may now dust or paint you embossed designs.  Here I used a rose color dust.

This cake was ordered the day before the party as a family friend was going to make the cake and then was hurt.   For 35 guests I used a 10" and 8".  I also used an umbrella (the extra one from the last blog) and finished the design with a lovely pink bow featured on the backs of the chairs at the party venue.


As a Sugar Artist, I take get care in planning all of  my customers requests, however, once in a while, I receive that emergency call to help out another baker or, in this case, fill in for another.  

I was very pleased with the final result and my customer was thankful and very impressed.  

Umbrella cake


"Spring Showers"
 theme for a bridal shower cake.  

Using the container lid (6" circle) I cut pastillage paste. Then using Wilton gumpaste cutters (small circle) I cut points on the outer edge for marking the ribs of the umbrella. Remember to put a small hole in the center to attach the handle.


I was able to get several apple crate liners from my local Wegmans.

Here I have cut into individual cups.  I then put strips of hot glue on the bottom of the cup to create the ribs.  I left the pastillage to dry two days.


On day three I took the dried umbrella off the form, overturned the form and then put the umbrella underside up to make sure I have a solid dry lid before adding embellishments.  

 Note:  I made two umbrella shells incase I damaged one.


This tool is a pastry wheel to crimp edges of delicate dough.  I cut thin stripes of paste to add to the ribs creating ruffles.


Sometimes I become so engrossed with the project I forget to take pictures (which is the case here.) I have added all the ruffles.

The handle is several wires taped together to create a stick, which is then wrapped in gum paste and allowed to dry several days (leave approximately 1/2 inch of the wire exposed at the top to attach the handle to the umbrella.)  Apply gum glue to the top of the handle and insert it through the underside of the umbrella canopy,  with the exposed wire sticking out the top.  I then used a tall glass to help support the canopy of the umbrella so that the handle could dry for a few days ensuring a strong bond.

At this point the finishing embellishments were added to the canopy and again I left them to dry a few days.


This umbrella was used upside down.
 (If you are making the umbrella to fill as I have here, you may leave out the wire in the handle, you can insert it into the flower display to attach it)

I filled the underside of the umbrella with green hydrangea petals and pink filler flowers to represent the wedding colors.


The coma shaped cake was Almond with Raspberry Compote.  It was frosted in white buttercream and trimmed in pink, using a large shell tip.

The umbrella was placed at the wide end of the coma and additional green hydrangeas were placed at the base of the curve.


A few days after the coma cake was served, the brides mother ordered another cake for a smaller celebration in which an elderly grandmother would be in attendance.  The mother requested just the buttercream without the flowers as she stated the cake looked like fine architecture and she wanted to enjoy the frame.  

Give me Chocolate


This is a 12x17 Chocolate Sheet cake with fudge filling and chocolate buttercream.

The gumpaste flowers are single hydrangea petals in pink along with fully open pink peony's  


Blue Filler Flowers


There are times when it is fun to create flowers that are not true to nature but are creative to the overall design and color.  This flower falls into the category.

I started with a very small six petal cutter and powder blue paste.
First cut out a petal and then cut it in half.

Next cut each of three petals in half to create six thin petals.  Using the pointed end of a Cel-stick, thin each of the petals.  Using two the these (six petal halts) gently wrap one around a prepared stamen and then wrap the second around the same stamen.  I set these aside to dry several hours.


Using a five petal cutter I gently creased the center of each petal on its top side.  
I then turned to petal over and gently thin the edges with a med ball tool to gave them a slight ruffle. 

 Turing the petal back over to the front, insert the prepared center and set aside to dry. If you need the flower to have more of a "cup" you can dry the flower set inside an egg carton cup.  

 When completely dry, I dusted from the edges of each petal pulling the color to the center with a deeper color blue, giving it depth.  Not sure where I will use these, but very pleased with the outcome. ;-)

Strawberry Fields forever


A second wedding is an opportunity for a fresh start.  
This couple choose a design from the internet.
Several weeks in advance I prepared all the embellishments necessary 


The coloring of the blue and green leafs was accomplished by first cutting and veining the leaf in a pale color.  Then using a deeper petal dust, just pulling the color from the edge to the center with a fine paint brush.  The center is never colored in.


Cherries and Strawberries along with random blossoms are pictured above.


The close up.


This finished cake consists of three tiers.  

The bottom tier is a 12" Chocolate hazelnut with hazelnut mousse.  This tier is 5" high.  The middle tier is a 9" Key Lime with Key Lime Mousse.  This tier is 3" high and the top tier is a 7" French Vanilla Bean with Vanilla Custard.  The top tier is also 5" high.  The top flower is a fantasy flower  dusted in the cake colors with ivy.